Viking Oven Self-Cleaning Instructions
Viking ovens often come with a self-cleaning feature that helps to remove grease and food residue. This feature, known as a pyrolytic self-cleaning cycle, uses high heat to burn off food particles and leave behind a small amount of ash that can be easily wiped away; To properly utilize this feature, follow these steps⁚
Introduction
Viking ovens are renowned for their high-quality construction, sleek design, and advanced features, including self-cleaning capabilities. Self-cleaning ovens offer a convenient solution for maintaining a spotless oven interior, eliminating the need for tedious scrubbing and manual cleaning. This comprehensive guide will provide you with detailed instructions on how to effectively utilize the self-cleaning function in your Viking oven, ensuring optimal performance and a sparkling clean oven.
Understanding Viking Oven Self-Cleaning
Viking ovens employ a pyrolytic self-cleaning process, which involves heating the oven cavity to extremely high temperatures, typically reaching 900°F or more. This intense heat effectively incinerates food residue, grease, and baked-on spills, transforming them into a fine ash. The self-cleaning cycle typically lasts several hours, with a cooling down period afterward. Once the oven has cooled, you can easily wipe away the remaining ash with a damp cloth or sponge. This self-cleaning method eliminates the need for harsh chemicals and strenuous scrubbing, making it a convenient and efficient way to maintain a clean oven interior.
Preparing for the Self-Cleaning Cycle
Before initiating the self-cleaning cycle, it’s crucial to properly prepare your Viking oven to ensure a safe and effective cleaning process. Begin by removing all oven accessories, including the broiler pan, broiler grid, oven racks, and any other utensils. These items are not designed to withstand the high temperatures of the self-cleaning cycle and could be damaged. Next, carefully clean up any excessive spills or food debris inside the oven. This will help prevent excessive smoke or flare-ups during the cleaning cycle. Remember to check your oven’s manual for specific instructions on preparing for the self-cleaning cycle, as there may be model-specific guidelines.
Removing Oven Accessories
Prior to initiating the self-cleaning cycle, it’s essential to remove all oven accessories to prevent damage from the high temperatures. These accessories include the broiler pan, broiler grid, oven racks, and any other utensils that might be present inside the oven. The self-cleaning process involves extremely high temperatures, which are not designed for these accessories. Carefully remove each item and set them aside in a safe location. This ensures that the accessories are protected from potential damage and that the self-cleaning cycle can operate effectively without any obstructions.
Cleaning Spills
Before starting the self-cleaning cycle, it’s crucial to address any spills or excessive food residue in the oven. These can create excessive smoke, flare-ups, or even damage the oven during the high-heat cleaning process. Use a damp cloth or sponge to wipe up any visible spills. For stubborn stains, you can apply a gentle oven cleaner, but ensure it’s compatible with your Viking oven’s materials. Remember to thoroughly rinse the area with clean water and allow it to dry completely before initiating the self-cleaning cycle. This proactive step helps ensure a safe and effective cleaning experience.
Initiating the Self-Cleaning Cycle
Once your Viking oven is prepared for self-cleaning, it’s time to initiate the cycle. Consult your oven’s user manual for the specific instructions on how to start the self-cleaning process. Typically, you’ll need to select the “Self-Clean” or “Clean” setting on the oven’s control panel. The oven will then begin heating up to a very high temperature, usually around 900°F, to burn off any food residue. This cycle can last anywhere from three to three and a half hours, depending on the model and the amount of soil buildup. The oven door will automatically lock during the cleaning cycle to prevent accidental opening and ensure safety. You’ll hear a fan running inside the oven as part of the self-cleaning process, which helps circulate the heat and burn off the residue.
Safety Precautions During Self-Cleaning
While the self-cleaning feature in your Viking oven is designed to be safe and efficient, it’s important to take certain precautions to avoid accidents or damage. Firstly, never open the oven door during the self-cleaning cycle, as the high temperatures inside could cause severe burns. The door will be locked automatically during the cycle, and attempting to force it open could be dangerous. Secondly, ensure that the oven is free of any flammable materials or items that could be damaged by the intense heat. Remove all oven racks, broiler pans, and any other utensils before starting the self-cleaning cycle. It’s also recommended to avoid using any harsh chemicals or cleaners on the oven interior before or after the self-cleaning cycle. The high temperatures can react with these chemicals, potentially creating harmful fumes. Always consult your oven’s user manual for specific safety guidelines and precautions related to the self-cleaning function.
After the Self-Cleaning Cycle
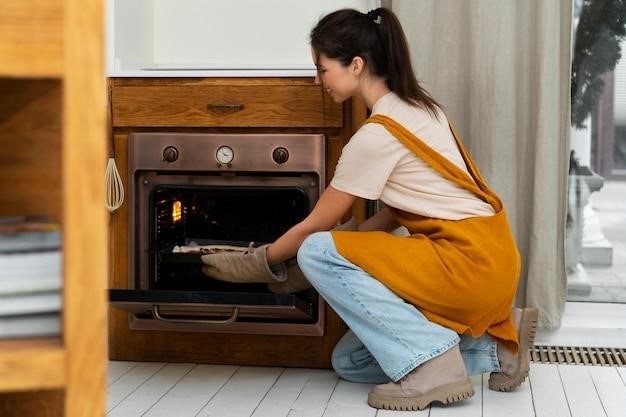
Once the self-cleaning cycle is complete, allow the oven to cool down completely before attempting to open the door. This cooling down period can take up to 30 minutes, depending on the model and the length of the self-cleaning cycle. After the oven has cooled, you will notice a fine layer of ash residue at the bottom of the oven. This ash is a natural byproduct of the high-heat burning process and is easily removed. Use a damp cloth or sponge to wipe away the ash residue. Avoid using any abrasive cleaners or scrubbing tools, as these could damage the oven’s enamel coating. Once the ash is removed, you can replace the oven racks and other utensils and your Viking oven will be ready for use.
Ash Removal
After the self-cleaning cycle is complete and the oven has cooled down, you’ll find a thin layer of ash residue at the bottom of the oven. This ash is a natural byproduct of the high-heat burning process that removes food particles and grease. To remove the ash, use a damp cloth or sponge. Avoid using abrasive cleaners, scouring pads, or harsh chemicals, as these can damage the oven’s enamel coating. Simply wipe the ash away gently, and your oven will be clean and ready for use. Remember, always allow the oven to cool completely before attempting to remove the ash. Opening the door while the oven is still hot can cause burns and may even damage the door seal.
Cooling Down Period
After the self-cleaning cycle is complete, the oven will remain hot for a significant amount of time. It’s crucial to allow the oven to cool down completely before attempting to open the door or remove any items from inside. This cooling down period typically takes about 30 minutes, but it’s best to err on the side of caution and wait longer if you’re unsure. Opening the door too soon can cause burns or even damage the oven’s door seal. While the oven is cooling down, you can hear a fan running inside. This fan helps to circulate air and cool down the oven more quickly. Once the fan stops and the oven feels cool to the touch, you can safely open the door and begin the ash removal process. Remember, patience is key when it comes to self-cleaning your Viking oven. Allowing the oven to cool down properly ensures a safe and efficient cleaning experience.
Troubleshooting Self-Cleaning Issues
While Viking ovens are known for their quality and reliability, occasional self-cleaning issues might arise. Two common problems include door locking/unlocking difficulties and the self-cleaning cycle failing to start or complete. If you encounter door locking or unlocking problems, make sure the door is properly closed and latched. Check for any obstructions that might be preventing the door from sealing correctly. If the issue persists, it’s best to consult your Viking oven’s manual or contact customer support for further guidance. If the self-cleaning cycle doesn’t start or finish as expected, ensure the oven is plugged in properly and the power switch is turned on. Verify that the self-cleaning cycle is selected correctly and that the timer is set for the appropriate duration. If these checks don’t resolve the issue, it might indicate a malfunctioning component, and professional assistance may be required. Remember, attempting to troubleshoot complex electrical issues without proper knowledge can be dangerous. Always prioritize safety and seek professional help when necessary.
Door Locking/Unlocking Problems
A common issue with Viking oven self-cleaning cycles is difficulty with the door locking or unlocking. This can stem from several reasons. Firstly, ensure the door is properly closed and latched. If the latch isn’t fully engaged, the locking mechanism might not activate. Secondly, check for any obstructions that might be preventing the door from sealing correctly. This could include items left inside the oven or a buildup of debris around the door seal. If you find any obstructions, remove them before attempting to lock the door again. If the door still fails to lock or unlock, it’s possible there’s a malfunction with the locking mechanism itself. This might require professional assistance. To avoid potential hazards, avoid forcing the door open or closed. Instead, consult your Viking oven’s manual or contact customer support for further instructions.
Self-Cleaning Cycle Not Starting/Completing
If your Viking oven’s self-cleaning cycle isn’t initiating or finishing properly, it could be due to a few factors. Firstly, check the oven’s power supply and ensure it’s properly connected and receiving electricity. A faulty electrical connection can prevent the cycle from starting. Secondly, verify that the self-cleaning cycle is correctly selected on the oven’s control panel. Incorrect settings can lead to the cycle not starting. Thirdly, inspect the oven’s temperature sensor. A malfunctioning sensor can prevent the oven from reaching the high temperatures needed for self-cleaning. If the cycle starts but doesn’t complete, it could be due to a faulty control board or a malfunctioning heating element. These issues often require professional diagnosis and repair. Before attempting any troubleshooting, consult your Viking oven’s manual or contact customer support for specific instructions and safety precautions.
Alternative Cleaning Methods for Viking Ovens
While Viking ovens feature a self-cleaning function, there are alternative methods to maintain their cleanliness. For manual cleaning, remove oven racks and other accessories. Use a baking soda paste or a commercial oven cleaner, applying it to the interior surfaces and allowing it to sit for a few minutes. Then, scrub the surfaces with a non-abrasive sponge or cloth. Rinse thoroughly with water and dry the oven completely. For French door Viking ovens, a steam cleaning option may be available. This method utilizes steam to loosen and dissolve grease and food residue, making it easier to wipe clean. Always refer to your Viking oven’s manual for specific instructions and safety precautions related to these alternative cleaning methods.
Manual Cleaning
Manual cleaning is a viable option for Viking ovens, especially if you prefer a hands-on approach or have minor spills and messes. Begin by removing all oven racks and accessories, such as the broiler pan and grid. These items can be cleaned separately using hot, soapy water or a mild detergent. For the oven interior, you can choose between a homemade baking soda paste or a commercial oven cleaner. Apply the cleaning solution to the surfaces, letting it sit for a few minutes to loosen stubborn grease and food residue. Use a non-abrasive sponge or cloth to scrub the interior, ensuring to reach all corners and crevices; Rinse thoroughly with water and dry the oven completely before reinstalling the racks and accessories.
Steam Cleaning (French Door Models)
Viking French door ovens offer a unique steam cleaning option for the upper oven. This method utilizes the power of steam to loosen and remove food residue, making cleaning easier and faster. To initiate steam cleaning, simply fill the oven’s water reservoir with clean water and select the steam cleaning cycle. The oven will then heat the water to create steam, which will circulate within the oven chamber. The steam will soften and loosen food particles, making them easier to wipe away. After the steam cleaning cycle is complete, use a damp cloth or sponge to wipe away any remaining debris. Be sure to dry the oven thoroughly after cleaning to prevent moisture buildup and potential issues.
Tips for Maintaining Your Viking Oven
Maintaining your Viking oven is crucial for ensuring its longevity and performance. Regular cleaning is essential, as it helps prevent grease buildup and the potential for fires. Always refer to your Viking oven’s user manual for specific cleaning instructions. Avoid using harsh chemicals or abrasive cleaners on the oven’s interior or exterior, as these can damage the finish. When cleaning the oven racks, use a mild detergent and warm water, scrubbing gently to remove any stubborn residue. To prevent spills from burning onto the oven floor, wipe up any spills immediately. Additionally, avoid overloading the oven, as this can lead to uneven heating and potentially damage the oven’s elements. By following these simple maintenance tips, you can keep your Viking oven in optimal condition for years to come.
Regular Cleaning
Regular cleaning is essential for maintaining your Viking oven’s efficiency and preventing the buildup of grease and food residue. While the self-cleaning feature is a convenient option for deep cleaning, it’s not a substitute for regular maintenance. After each use, wipe down the oven’s interior with a damp cloth and mild detergent to remove any spills or splatters. Pay particular attention to the oven door and its seal, as these areas are prone to grease buildup. Clean the oven racks regularly using a mild detergent and warm water. For stubborn stains, you can use a non-abrasive cleaner, but always test it on a small, inconspicuous area first. By following these simple cleaning tips, you can keep your Viking oven sparkling clean and ensure it performs optimally for years to come.
Avoiding Oven Damage
While the self-cleaning feature of your Viking oven is designed to be safe and effective, there are certain precautions you should take to avoid potential damage. Firstly, never use harsh chemicals or abrasive cleaners on the oven’s interior, as these can scratch the surface and compromise its functionality. Always refer to your oven’s manual for specific cleaning instructions and recommended products. Additionally, ensure that you remove all removable parts, such as oven racks and broiler pans, before initiating the self-cleaning cycle. This will prevent them from being damaged by the high temperatures. Finally, never attempt to clean any other parts of your oven using the self-cleaning feature, as this can lead to malfunction or even fire hazards. By adhering to these guidelines, you can ensure the longevity and optimal performance of your Viking oven.