Auto Detailing Guide⁚ A Comprehensive Guide to Achieving a Showroom Shine
This comprehensive guide will walk you through the process of auto detailing, from essential tools and supplies to maintaining your car’s showroom shine. Learn the steps involved in exterior and interior detailing, as well as wheel and tire care. Whether you’re a beginner or seasoned detailer, this guide provides valuable tips and techniques to achieve professional results.
Introduction
Auto detailing goes beyond a simple car wash; it’s an art form that transforms your vehicle from ordinary to extraordinary. It involves a meticulous process of cleaning, polishing, and protecting both the exterior and interior of your car, bringing back its showroom shine and extending its lifespan. This comprehensive guide will equip you with the knowledge and techniques to achieve professional-level detailing results, whether you’re a seasoned enthusiast or just starting out. From selecting the right tools and supplies to mastering the art of paint correction and interior rejuvenation, we’ll cover every step of the detailing journey. Get ready to transform your car into a masterpiece.
Essential Tools and Supplies
To embark on your detailing journey, you’ll need a well-equipped arsenal of tools and supplies. A good quality car wash soap, two buckets, a wash mitt, microfiber towels, a clay bar, a detailing spray, a polishing compound, a wax or sealant, a vacuum cleaner with attachments, interior brushes, leather cleaner, and a glass cleaner are essential. Additionally, consider investing in a pressure washer for thorough cleaning, a rotary or dual-action polisher for paint correction, and a tire dressing for that glossy finish. Remember, quality tools make a significant difference in achieving professional results, so choose wisely.
Preparing for the Detailing Process
Before diving into the detailing process, proper preparation is key. Start by choosing a well-ventilated area, ideally a shaded spot to avoid direct sunlight, which can cause water spots and hinder the drying process. Gather all your tools and supplies, ensuring you have enough microfiber towels, wash mitts, and detailing brushes. A thorough pre-wash with a pressure washer can loosen dirt and grime, making the subsequent wash more effective. Remember to protect your car’s interior by covering sensitive areas with towels or plastic sheeting. With these steps, you set the stage for a successful and efficient detailing session.
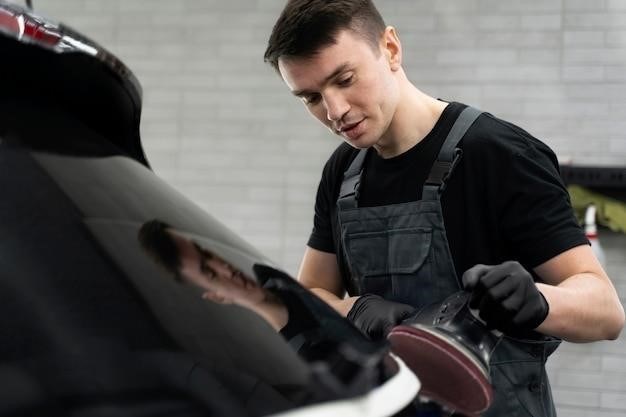
Exterior Detailing
Exterior detailing transforms your car’s appearance, restoring its shine and protecting its finish. It involves a multi-step process that begins with a thorough wash to remove dirt and grime. Next, paint decontamination removes embedded contaminants like iron particles and tree sap, ensuring a smooth surface for subsequent steps. Polishing and refining address imperfections like swirl marks and scratches, enhancing the paint’s clarity and depth. Finally, waxing or sealing protects the paint from environmental damage, providing a durable layer that repels water, dirt, and harmful UV rays. By following these steps, you can achieve a flawless exterior finish that will turn heads.
Washing and Cleaning
Washing your car is the foundation of any detailing process, removing loose dirt, grime, and debris before you move on to more intricate steps. A two-bucket wash method is essential for minimizing the risk of scratching your paint. Fill one bucket with soapy water and the other with clean water. Use a wash mitt to apply soap to your car, rinsing the mitt frequently in the clean water bucket to prevent dirt from being transferred back onto the paint. After washing, thoroughly rinse the car with clean water to remove all soap residue. Finally, dry the car using a microfiber towel, paying attention to crevices and seams where water can pool.
Paint Decontamination
Paint decontamination is a crucial step in achieving a flawless finish. It involves removing embedded contaminants like tree sap, overspray, iron particles, and industrial fallout that can’t be removed by washing alone. Clay bar treatment is a common method for decontamination. Using a clay bar and a lubricant, gently glide the bar across the paint surface to remove embedded contaminants. After clay bar treatment, inspect the surface to ensure all contaminants are removed. Always remember to work in small sections and use light pressure to avoid scratching the paint. For a more thorough decontamination, consider using an iron remover product, which dissolves iron particles that can cause staining and etching.
Polishing and Refinishing
Polishing and refinishing are essential steps to restore your car’s paint to its original glory. Polishing removes imperfections like scratches, swirl marks, and oxidation, revealing a smoother and shinier surface; There are various levels of polish, from light polish for removing minor imperfections to heavy polish for removing deeper scratches. For a professional finish, consider using a dual-action polisher. This type of polisher provides even pressure and reduces the risk of burning the paint. Apply the polish to a polishing pad and work in small sections, using light pressure and overlapping strokes. Once the polish is applied, buff it off with a microfiber towel for a brilliant shine. Remember to choose the right polish for your paint type and desired level of correction. For a deep shine, consider applying a sealant or wax after polishing to protect the paint and enhance its gloss.
Waxing and Sealing
Waxing and sealing are crucial steps in protecting your car’s paint and enhancing its shine. Wax creates a protective layer that shields the paint from UV rays, environmental contaminants, and minor scratches. It also enhances the paint’s gloss and depth, giving your car a showroom-like finish. There are various types of wax, including carnauba wax, synthetic wax, and sealant. Carnauba wax is a natural wax known for its durability and gloss, while synthetic wax offers superior protection against harsh elements. Sealants provide a longer-lasting protective layer, typically lasting several months. Apply wax or sealant to a clean, dry surface using an applicator pad or microfiber towel. Work in small sections, applying thin, even coats. Allow the wax or sealant to cure according to the manufacturer’s instructions, then buff off the excess with a microfiber towel. Regular waxing and sealing will keep your car’s paint looking its best, protecting it from the elements and preserving its value.
Interior Detailing
Interior detailing involves meticulously cleaning and restoring the interior of your car to a pristine condition. This process encompasses everything from vacuuming and cleaning carpets and upholstery to treating leather and fabric surfaces, cleaning glass, and restoring plastic and trim. Start by removing all loose items from the interior and vacuuming all surfaces thoroughly, including the seats, carpets, floor mats, and under the seats. Pay attention to crevices and nooks where dust and debris may accumulate. For stubborn stains, use a specialized upholstery cleaner, following the manufacturer’s instructions. Treat leather seats and trim with a leather conditioner to keep them soft, hydrated, and protected. For fabric upholstery, use a fabric protector to prevent stains and repel spills. Clean the windows and mirrors with a dedicated glass cleaner, using a microfiber cloth for a streak-free finish. Finally, restore plastic and trim pieces using a plastic and vinyl cleaner or dressing to remove scuffs and restore their shine.
Vacuuming and Cleaning
Vacuuming and cleaning are the foundation of interior detailing. Start by removing all loose items from the interior, such as floor mats, trash, and personal belongings. Vacuum all surfaces thoroughly, including the seats, carpets, floor mats, and under the seats. Use a crevice tool to reach tight spaces and a brush attachment for upholstery. Pay close attention to areas where dirt and debris tend to accumulate, such as under the seats, around the pedals, and in the door pockets. For stubborn stains, use a specialized upholstery cleaner, following the manufacturer’s instructions. Apply the cleaner to a soft cloth and gently rub the stain until it lifts. Avoid using harsh chemicals or abrasive cleaners that can damage the fabric or leather. After cleaning, allow the upholstery to dry completely before applying any protectants or conditioners.
Leather and Fabric Treatment
Leather and fabric seats require specialized care to maintain their appearance and longevity. For leather seats, use a leather cleaner to remove dirt, grime, and stains. Apply the cleaner to a soft cloth and gently rub the leather in a circular motion. Avoid using harsh chemicals or abrasive cleaners that can damage the leather. After cleaning, apply a leather conditioner to moisturize and protect the leather. The conditioner will help to prevent cracking, fading, and dryness. For fabric seats, use a fabric cleaner to remove dirt, stains, and odors. Apply the cleaner to a soft cloth and gently rub the fabric in a circular motion. Avoid using harsh chemicals or abrasive cleaners that can damage the fabric. After cleaning, allow the fabric to dry completely before applying any protectants or conditioners.
Glass Cleaning
Clean windows are essential for optimal visibility and a polished look. Use a dedicated glass cleaner formulated for automotive use, avoiding harsh chemicals that can streak or damage the glass. Spray the cleaner onto a microfiber cloth, not directly onto the glass, to prevent over-spray. Wipe the glass in a circular motion, ensuring you cover the entire surface. Use a clean, dry microfiber cloth to remove any streaks or residue. For stubborn stains or water spots, use a dedicated glass polish. Apply a small amount of polish to a microfiber cloth and rub it gently into the affected area. Wipe off the polish with a clean microfiber cloth. Remember to clean the inside and outside of the windows for a truly pristine look.
Plastic and Trim Restoration
Over time, the plastic and trim pieces in your car’s interior can fade, become discolored, and accumulate grime. Restoring these elements is crucial for a truly polished look. Start by vacuuming the trim and removing any loose debris. Then, use a dedicated plastic and trim cleaner, applying it to a microfiber cloth. Wipe the cleaner onto the trim, paying attention to crevices and hard-to-reach areas. Avoid spraying the cleaner directly onto the trim to prevent over-spray. After cleaning, use a plastic and trim protectant to restore shine and protect against future fading and discoloration. Apply the protectant to a microfiber cloth and wipe it onto the trim. Allow the protectant to dry completely for a long-lasting finish. For stubborn stains or scratches, consider using a plastic and trim restorer, following the manufacturer’s instructions carefully.
Wheel and Tire Care
Wheels and tires are often overlooked during detailing, but they play a crucial role in a car’s overall appearance. Clean wheels with a dedicated wheel cleaner, using a brush to reach into crevices and remove brake dust and grime. Avoid using harsh cleaners that can damage the wheel’s finish. Rinse the wheels thoroughly with water, ensuring all cleaner residue is removed. For tires, use a tire dressing to restore their shine and protect them from the elements. Apply the dressing to a sponge or applicator and spread it evenly over the tire sidewalls. Avoid applying the dressing too close to the tire tread, as it can attract dirt and debris. Allow the dressing to dry completely before driving, as it can make the tires slippery; Regularly cleaning and dressing your wheels and tires will keep them looking their best and enhance your car’s overall curb appeal.
Wheel Cleaning
Wheel cleaning is a crucial part of auto detailing, as it removes brake dust, road grime, and other contaminants that can dull their appearance. Start by rinsing the wheels thoroughly with water to loosen dirt and debris. Next, apply a dedicated wheel cleaner to the wheels, using a brush to reach into crevices and remove stubborn dirt. Pay attention to the wheel barrels, where brake dust often accumulates. Avoid using harsh cleaners that can damage the wheel’s finish. Allow the cleaner to dwell for a few minutes before rinsing it off thoroughly. For stubborn brake dust, consider using a clay bar to remove embedded contaminants. Finally, dry the wheels with a microfiber towel, ensuring all cleaner residue is removed. This thorough cleaning process will restore your wheels to their original shine and enhance the overall appearance of your car.
Tire Dressing
Tire dressing is a key step in auto detailing, adding a deep, rich black shine to your tires while protecting them from UV rays and other environmental factors. Choose a high-quality tire dressing that’s water-based and silicone-free, as these options offer better protection and a more natural finish. Apply the dressing to a clean, dry tire using a sponge or applicator, avoiding contact with the wheel. Spread the dressing evenly, ensuring it’s not overly thick. Allow it to dry for a few minutes, and then use a microfiber towel to buff any excess dressing. Avoid applying tire dressing to the sidewalls, as it can attract dirt and grime. Regular tire dressing will keep your tires looking their best and enhance the overall appearance of your vehicle.
Maintaining the Detail
Once you’ve achieved that showroom shine, it’s essential to maintain it. The best way to do this is to wash your car regularly using the two-bucket method. This involves using two buckets, one with soapy water and the other with clean water for rinsing your wash mitt. This helps prevent cross-contamination and minimizes scratches. Use a quality car shampoo and soft microfiber wash mitts. After washing, dry your car thoroughly with a clean, dry microfiber towel to prevent water spots. Additionally, consider applying a quick detailer spray after each wash. Quick detailers enhance gloss, remove dust, and provide a thin layer of protection. Regularly inspect your car’s paint for any new scratches or blemishes. If you see any, address them promptly to prevent further damage. Follow these simple steps to keep your car looking its best and extend the life of your detailing efforts.